Personal Hygiene Worksheets – Level 1
Welcome to the complete Level 1 Hygiene Program from CleanBeanKids! We believe that teaching children about personal hygiene should be fun, interactive, and easy for parents and educators. That’s why we’ve put together a full program of 7 engaging activities designed specifically for our youngest learners (Preschool & Kindergarten).
This guide includes everything you need to get started: fun printable worksheets, hands-on science experiments, and sensory activities that turn abstract concepts like “germs” and “cleanliness” into lessons your child can see, touch, and understand.
Let’s get started on our adventure to become a super clean-up crew!

Activity 1 & 2: The “Playtime’s Over!” Printable Worksheets
Our foundational printable pack includes two worksheets designed to work together.
Worksheet No. 1: Spot the Messy Spots! This activity introduces three friends—Laila, Eric, and John—who have all gotten a little messy after playing and eating. The child’s mission is to find and circle the messy spots on each friend, opening a conversation about different ways we get dirty.
Worksheet No. 2: My Cleaning Tools This matching game helps children connect different hygiene needs (like muddy hands or a messy mouth) with the correct tool that cleans it up (like soap or a toothbrush). It’s a perfect way to build problem-solving skills.

How to Use These Worksheets
For “Spot the Messy Spots!”:
- Read the stories for Laila, Eric, and John, and talk with your child about their adventures.
- Guide them to find and color the messy spot on each of the three children.
- Use it as a chance to talk about different ways we get dirty and why it’s important to clean up.
For “My Cleaning Tools!”:
- Help your child identify the body parts on the left and the cleaning tools on the right.
- Guide them to draw a line from each need to its solution.
- Talk about your daily routines and when you use each of these tools at home.
Activity 3: The Super Sneeze Experiment! (No Worksheet Needed)
This hands-on experiment makes the invisible concept of a sneeze visible and memorable.
- Objective: To help children understand why it’s essential to cover their mouth when they cough or sneeze, and to wash their hands afterward.
- Materials:
- A clean spray bottle filled with water.
- A sheet of dark-colored construction paper or a small mirror.
- Method:
- Let’s Be Scientists! Start by explaining that you’re going to do a fun experiment to see what a sneeze looks like. Compare the spray bottle to a sneeze: “When we sneeze, tiny droplets of water fly out of our nose and mouth, just like this spray bottle!”
- The “Sneeze”: Stand a few feet away from the dark paper or mirror. Spray the bottle once towards it. Ask the child to look closely at all the tiny water droplets that have landed on the surface.
- Connect to Germs: Explain, “Wow, look at all those droplets! When we really sneeze, tiny invisible germs travel in those droplets. We can’t see them, but they are there.”
- Cover the Sneeze: Now, ask the child to hold their hand (or elbow) in front of the spray bottle nozzle. Spray again. Ask, “What happened this time? Did the droplets go everywhere?” This shows how covering our sneezes keeps the “germs” from spreading.
- The Final Step: Point out that your hand is now wet from the “sneeze.” Ask, “Now my hand is covered in pretend germs. What should I do next?” Lead them to the answer: Wash our hands!
Activity 4: A Sensory Handwashing Adventure! (No Worksheet Needed)
This activity turns the routine of handwashing into a fun sensory game that engages sight, smell, and touch.
- Objective: To help children become familiar and comfortable with the process of washing their hands properly by focusing on the sensory experience.
- Materials:
- A sink (washroom or kitchen).
- Soap (a fun-smelling liquid soap is especially popular).
- A clean, soft towel.
- Method:
- Look Before You Wash: At the sink, have the child hold up their hands. Talk about them. “Let’s look at our hands. Can we see any dirt? Let’s check our palms, the backs of our hands, and even under our little fingernails.”
- The Feel of Water: Turn on the water and have them wet their hands. Ask questions to engage their sense of touch. “How does the water feel? Is it warm? Is it cool?”
- Soapy Fun: Dispense some soap into their hands. “How does the soap smell? Does it smell like apples? Now rub your hands together! How does it feel? Is it slippery? Look at all the bubbles we’re making!” You can even gently blow through their soapy fingers to make bubbles fly.
- Rinse and Dry: After scrubbing (you can sing a short song!), have them rinse their hands completely. “Let’s wash all the bubbles away!” Then, help them dry their hands on a clean towel. “How does the towel feel? Is it soft?”
- The Smell of Clean: Once their hands are dry, have them smell their own hands. “Wow, your hands smell so fresh and clean! That’s the smell of getting rid of the germs.”
Activity 5: All About Teeth (Printable & Sensory Activity)
This section is all about oral hygiene, combining a fun new worksheet for curious learners with a hands-on sensory activity to bring the lessons to life!
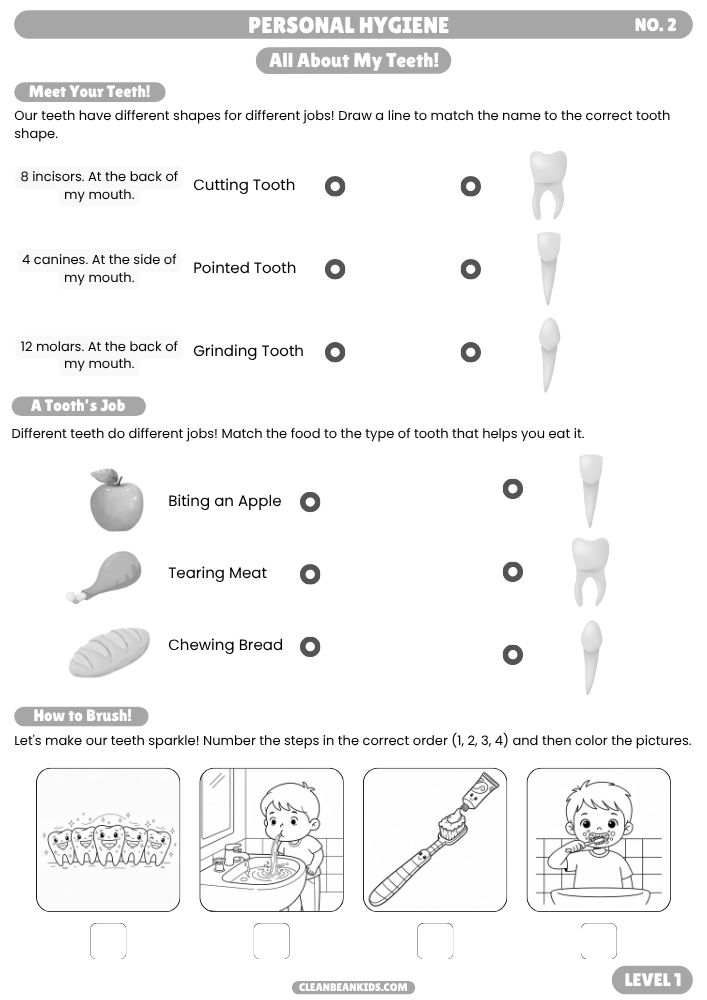
Printable Worksheet: “All About My Teeth!”
For kids who are ready to learn a little more, this worksheet dives into the different types of teeth and their special jobs, all in a fun and interactive way. This worksheet is slightly more advanced, making it perfect for older preschoolers or kindergarteners (Ages 5-6).
- Meet Your Teeth!: A simple matching game where children learn to identify the shapes of their “Cutting,” “Pointed,” and “Grinding” teeth.
- A Tooth’s Job!: Another fun matching activity that connects each tooth type to its job—like biting fruit, tearing meat, or chewing bread.
- How to Brush!: An interactive coloring and sequencing activity where kids put the four main steps of brushing teeth in the correct order.
Hands-On Fun: A Sensory Tooth Brushing Adventure!
This worksheet-free activity turns the daily routine of tooth brushing into a fun and memorable sensory experience.
- Objective: To help children become familiar and comfortable with the process of brushing their teeth by engaging all their senses.
- Materials:
- Your child’s own toothbrush.
- Child-safe toothpaste in fun flavors.
- A small cup for rinsing.
- A bathroom sink and mirror.
- Method:
- Get Ready: Start by looking in the mirror together. Make silly faces and look at your teeth. “Let’s get our teeth ready for their bath!”
- Meet the Toothpaste: Squeeze a tiny, pea-sized amount of toothpaste onto the brush. Ask questions to engage their senses: “Let’s smell the toothpaste. Does it smell like strawberries? What does it taste like?”.
- The Brushing Game: Wet the toothbrush. Begin brushing in gentle circles, as shown on the worksheet. Make it a game! “Let’s brush the top teeth and the bottom teeth separately!”.
- Rinse and Spit: Show them how to take a little water, swish it around, and spit it out into the sink.
- The Big Finish: Look in the mirror again at your sparkling clean teeth. Admire your work! “Wow, look how shiny and clean your teeth are!”.
Activity 6: The Great T-Shirt Experiment! (Printable & Long-Term Project)
Get your little scientist ready for a fascinating experiment that answers the question: “Why do we need to change our clothes?”. This long-term project is a powerful visual way to show that invisible germs really do grow on our clothes, especially when they are damp or dirty.
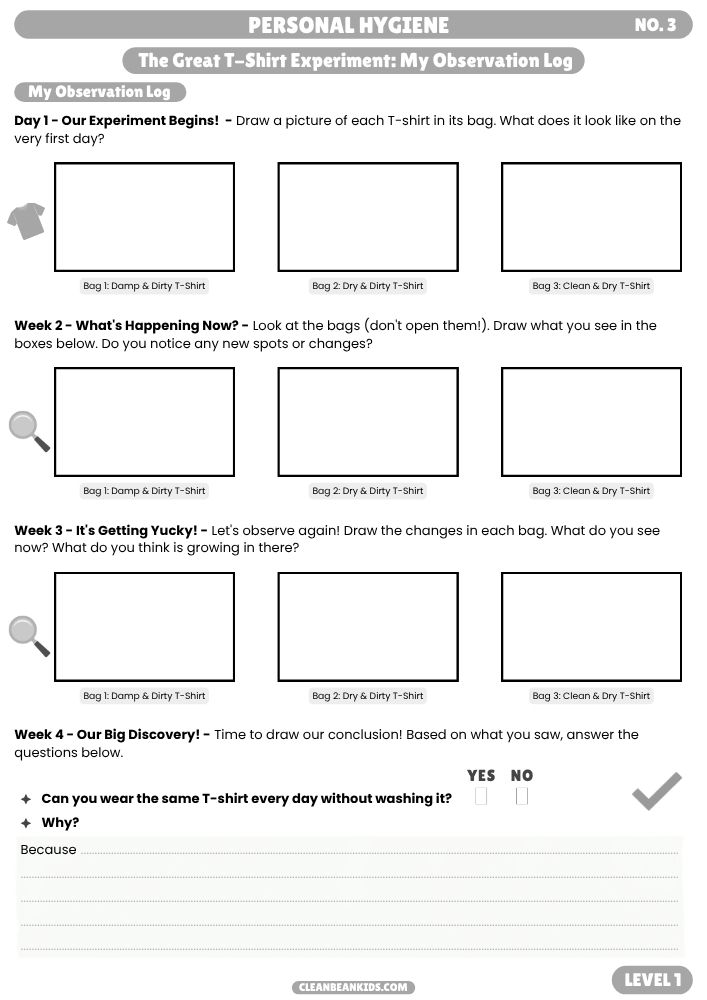
Printable Worksheet: “The Great T-Shirt Experiment: My Observation Log”
To track your scientific discoveries, we’ve created a simple observation log. Over four weeks, your child can draw what they see happening inside each bag, and finally, draw their own conclusions about why clean clothes are so important.
Hands-On Science: The Experiment
- Objective: To help children realize that germs multiply on clothes and to understand the conditions that help them grow (dampness, dirt, warmth).
- Materials:
- Three large, airtight plastic bags.
- A damp and dirty T-shirt.
- A dry but dusty/dirty T-shirt.
- A clean and dry T-shirt (this is our “control”).
- Adhesive tape to seal the bags.
- The printable “Observation Log” worksheet (Pupil’s sheet no 3).
- Method:
- Week 1: The Setup (30 minutes)
- Label Your Bags: Label your three plastic bags clearly: 1, 2, and 3.
- Bag 1 (The Damp & Dirty Shirt): Have your child place the damp white T-shirt inside Bag 1.
- Bag 2 (The Dry & Dirty Shirt): Have them place the dirty and dusty T-shirt inside Bag 2.
- Bag 3 (The Clean Shirt): Finally, place the clean and dry white T-shirt inside Bag 3.
- Seal and Place: Squeeze out most of the air and seal each bag tightly with adhesive tape. Place the bags in a warm spot, but away from direct sunlight.
- First Observation: Have your child draw what the T-shirt in each bag looks like on Day 1 of their worksheet.
- Weeks 2-4: Observation (10 minutes each week)
- Look, Don’t Touch! Each week, observe the bags without opening them.
- Ask Questions: Encourage your child to describe what they see. “Do you see any new spots? Has the color changed? Which T-shirt looks the yuckiest?”
- Record Your Findings: Have them draw their observations in the correct weekly section of their worksheet.
- Week 4: The Big Reveal & Conclusion (Adults Only!)
- SAFETY FIRST! This step should only be done by an adult in a well-ventilated area. The bags will likely smell bad and contain mold.
- Observe and Conclude: Carefully remove the clothes from the bags. Observe the new stains and the smell. Explain that these spots and the bad smell are signs of millions of tiny germs having a party!
- Fill out the Conclusion: Now, help your child answer the final questions on their worksheet. Can we wear the same T-shirt every day without washing it? No!. Why? Because germs grow on it and make it dirty and smelly!.
- Clean Up: Safely throw away all the experiment materials and wash your hands thoroughly.
- Week 1: The Setup (30 minutes)
- Learning Takeaway: This experiment clearly shows why we need to change our clothes often, especially underclothes which are in contact with body secretions, to keep germs from multiplying.
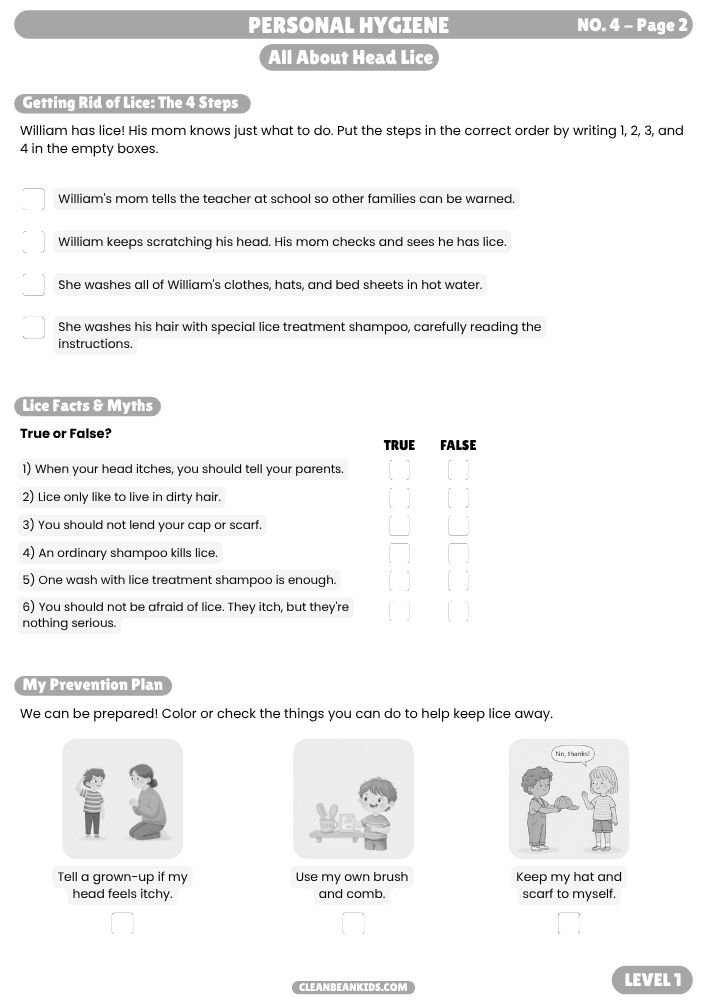
Activity 7: All About Head Lice (2-Page Printable & Guide)
Let’s talk about a very common schoolyard topic: head lice. It’s important to approach this subject calmly and with facts, so children feel prepared, not scared. This activity is designed to demystify lice, teach prevention, and explain the steps to take if these tiny visitors arrive.
Printable Worksheet: “All About Head Lice: A Kid’s Guide” (2 Pages)
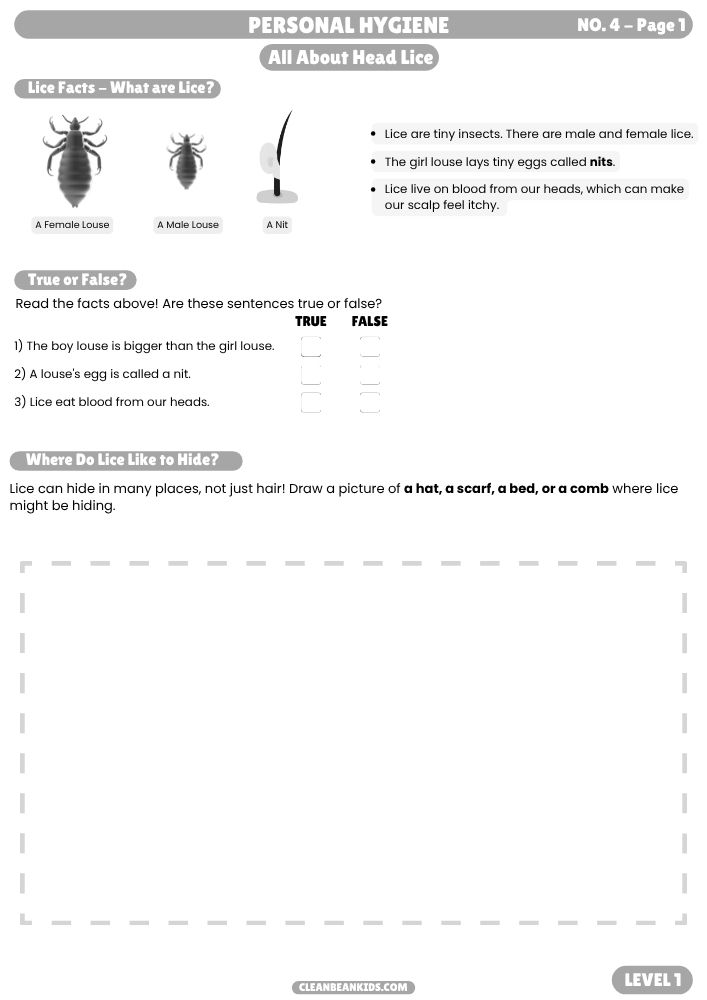
This two-page guide is packed with activities to give your child a comprehensive and reassuring overview of head lice. It covers what lice are, how to get rid of them, and how to prevent them.
- Page 1: “What Are They & Where Do They Hide?” introduces what lice are with simple facts and illustrations, checks understanding with a few “True or False” questions, and includes a creative drawing activity about where lice can hide.
- Page 2: “How to Win the Fight!” focuses on action. It includes a sequencing activity to teach the correct steps for getting rid of lice, a myth-busting “True or False” section to empower kids with correct information, and a proactive “My Prevention Plan” to build good habits.
How to Talk About Lice with Your Child
- Objective: To make children aware of what lice are, the risks of contamination, how it happens, and learn how to combat them.
- Materials: The “All About Head Lice” 2-page worksheet and crayons or a pencil.
Method:
- Start the Conversation: Begin by asking what they already know about lice. Address any fears right away. “Have you ever heard of head lice? They are tiny little bugs that are common at school, but they aren’t dangerous, just itchy!”
- Use the Worksheet as a Guide: Go through the “Lice Facts” on Page 1 together. The simple illustrations will help make the topic less intimidating.
- Discuss Contamination: Use the “Where Do Lice Like to Hide?” drawing activity on Page 1 to talk about how lice can spread—not just from head-to-head contact, but also by sharing things like hats, scarves, and beds. This is a great time to review the rule: “We don’t share things that go on our hair.”
- Empower with a Plan: Use the sequencing activity and “My Prevention Plan” on Page 2 to show that there is a clear, simple plan to both get rid of lice and prevent them. This gives children a sense of control.
- Bust the Myths: Go through the “True or False” sections together to reinforce important facts, such as “Lice can live in clean hair, too!” and “We should always tell a grown-up if our head feels itchy.”.
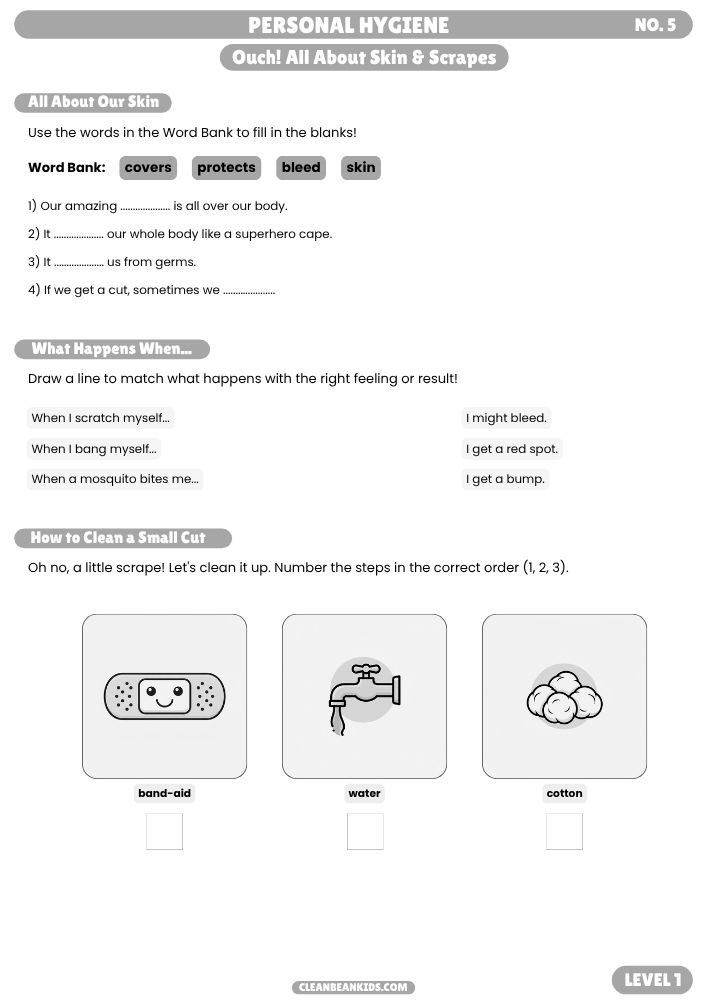
Activity 8: Ouch! De-dramatizing Scrapes & Cuts (Printable & Activity)
Little scrapes, bumps, and bug bites are a normal and expected part of being an active, curious kid! This activity is designed to de-dramatize these small injuries by teaching children that they are manageable and showing them how to easily prevent infection with simple first aid.
Printable Worksheet: “Ouch! All About Skin & Scrapes”
This one-page worksheet is packed with gentle and empowering activities to teach children about their skin and how to care for minor wounds.
- All About Our Skin: A simple fill-in-the-blanks activity using a word bank to teach the basic functions of our skin.
- What Happens When…: A clear and simple matching game where kids connect a cause (like a scratch or a mosquito bite) to its effect (like bleeding or a red spot).
- How to Clean a Small Cut: We’ve replaced the confusing “secret code” from the original document with a much more useful and age-appropriate sequencing activity that teaches the 3 basic steps of cleaning a wound.
Hands-On Fun: Meet “Mr. or Ms. Ouchie!”
This is a wonderful long-term activity for a classroom or home to help de-dramatize everyday bumps and scrapes.
- Objective: To normalize small injuries and improve knowledge of the body in a fun, collective way.
- Materials:
- A large sheet of paper.
- Markers or crayons.
- Band-aids (optional).
Method:
- Create Your Character: On the large sheet of paper, draw a simple, large outline of a person. With the children, give your character a fun name, like “Mr. Ouchie” or “Ms. Bumpy”. Post this drawing on a wall at child-height.
- Document the Ouchies: Each time a child gets a small, everyday scrape, bump, or cut (after it has been cared for by an adult, of course!), they get to mark it on the character. They can draw a little “x,” a small circle, or even place a real band-aid on the corresponding body part of “Mr. Ouchie.”
- Talk About It: This simple act turns a moment of minor distress into a moment of learning. It helps children identify body parts and understand that these little hurts are a normal part of life that heal over time.
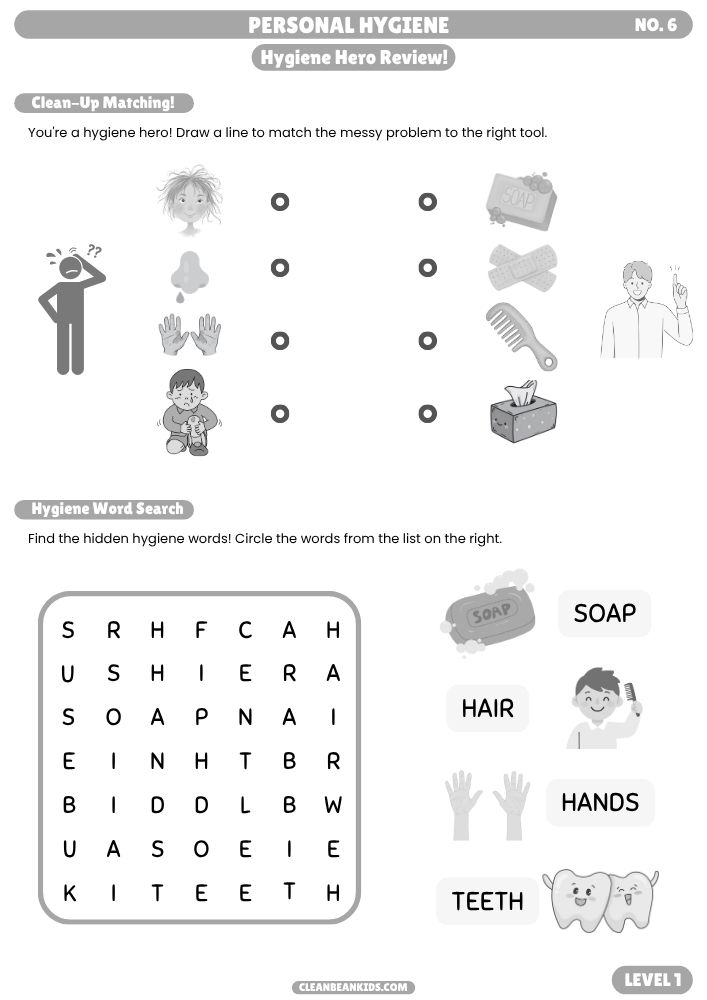
Activity 9: The “Hygiene Hero” Final Review! (Printable)
It’s time to put all our new skills to the test! This final worksheet in our Level 1 program is a fun “Hygiene Hero Review” designed to celebrate everything your child has learned.
Printable Worksheet: “Hygiene Hero Review!”
This one-page printable is packed with two great review activities:
- Clean-Up Matching!: A comprehensive matching game where your child will connect different hygiene needs (like messy hair or a runny nose) to the correct tools (like a comb or a tissue) they’ve learned about.
- Hygiene Word Search: A super-simple word search. Children can practice visual recognition by finding 4 key vocabulary words: SOAP, HAIR, HANDS, and TEETH. The list includes pictures, so no reading is required!
How to Use This Worksheet
- Objective: To review and reinforce the main hygiene topics covered in the Level 1 program (hands, hair, nose, teeth, scrapes) in a fun, game-like format.
- Materials: The “Hygiene Hero Review!” worksheet and a crayon or pencil.
Method:
- Celebrate Their Knowledge: Present this worksheet as a fun “challenge” to see how much they’ve learned. “You’re a Hygiene Hero! Let’s show off your amazing new skills!”
- Guide the Matching: For the “Clean-Up Matching” activity, point to the first picture (e.g., messy hair) and ask, “Oh no, messy hair! What tool do we need to make it neat again?” Let them find the comb and draw a line.
- Hunt for Words: For the word search, show them how to find the first word. Point to the picture of “SOAP” and the word next to it. “Let’s find the letters S-O-A-P in the puzzle!” This is a great pre-reading and visual scanning exercise.
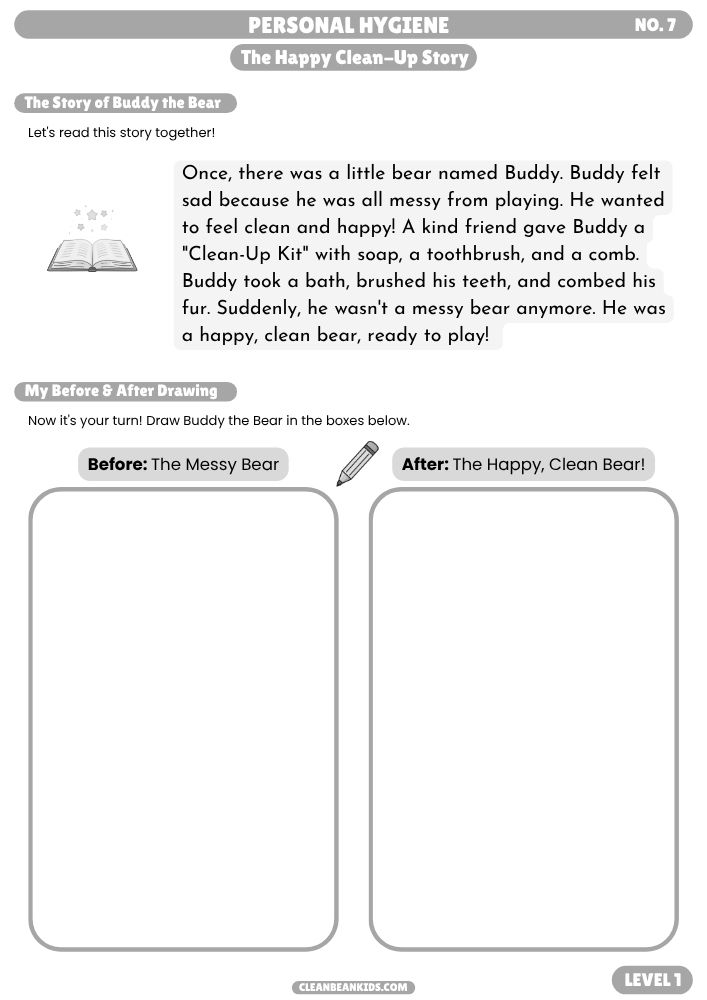
Activity 10: The Happy Clean-Up Story (Printable & Read-Aloud)
We’ve reached the final activity in our Level 1 program! This is a gentle “read-aloud” story that ties all our lessons together. It’s the perfect way to conclude the program and reinforce the positive feelings associated with being clean and healthy.
Printable Worksheet: “The Happy Clean-Up Story”
This one-page printable features a short, simple story designed to be read by a parent or educator. It tells the tale of a sad, messy little bear who learns how to get clean with a few special tools, and discovers how good it feels!
- The Story: A short, read-aloud story about transforming from messy to clean.
- Drawing Activity: The main activity! The worksheet includes two large boxes for your child to draw their own “Before” (messy) and “After” (clean) pictures, just like in the story.
How to Use This Worksheet
- Objective: To review all the hygiene tools (soap, toothbrush, etc.) in a positive story format and to allow the child to creatively express what they’ve learned about being “messy” vs. “clean.”
- Materials: The “Happy Clean-Up Story” worksheet and crayons or markers.
Method:
- Read Together: Cuddle up and read the short story on the worksheet to your child. Use different voices and make it fun.
- Talk About the Story: Ask simple questions like, “How did the bear feel when he was messy?” and “What tools did he use to get clean?”.
- Time to Draw!: Read the instructions for the drawing activity. Talk about what the bear looked like in the “Before” box (muddy, messy fur) and what he looked like in the “After” box (sparkling, happy, and clean!).
- Display Their Art: Celebrate their drawing as the “final chapter” of their Level 1 hygiene adventure!